On a phone or a Mac? TallyMint also runs in any browser as TallyMint Web, a subscription from $9.99 a month.
Getting started with TallyMint
From a fresh install of the Windows app to a working setup in about fifteen minutes, all inside the free trial: an encrypted data file, your accounts, a few transactions, and the recurring bills that power the forecast.
Step 1: Create your data file and master password
Everything in TallyMint lives in an encrypted file on your own computer. The first time you open the app, you choose where that file goes and set a master password. Pick something strong and memorable: there is no reset link in an email.
Fresh installs default to a Documents\TallyMint folder, and that is a fine place to leave it. Your ledger can live anywhere, though, including a synced folder like Google Drive or OneDrive if you want it mirrored to another machine. Sync the whole folder rather than the data file on its own: your ledger is the data file plus a small .keyenv key file beside it, and neither is any use without the other. What lands in your cloud is encrypted either way, and it does not open without your master password.
Step 2: Add your accounts and opening balances
Next, add the accounts you want to track: checking, savings, credit cards, loans, and investment accounts. For each one, set an opening balance that matches the real account on the day you start. The opening balance is the anchor for the running balance in the register, so getting it right up front means every later total lines up with your bank.
If you are coming from Quicken or another desktop finance app, you can skip most of the manual entry. Import your history first with the QIF import guide, and your accounts and transactions come across together.
Step 3: Enter transactions
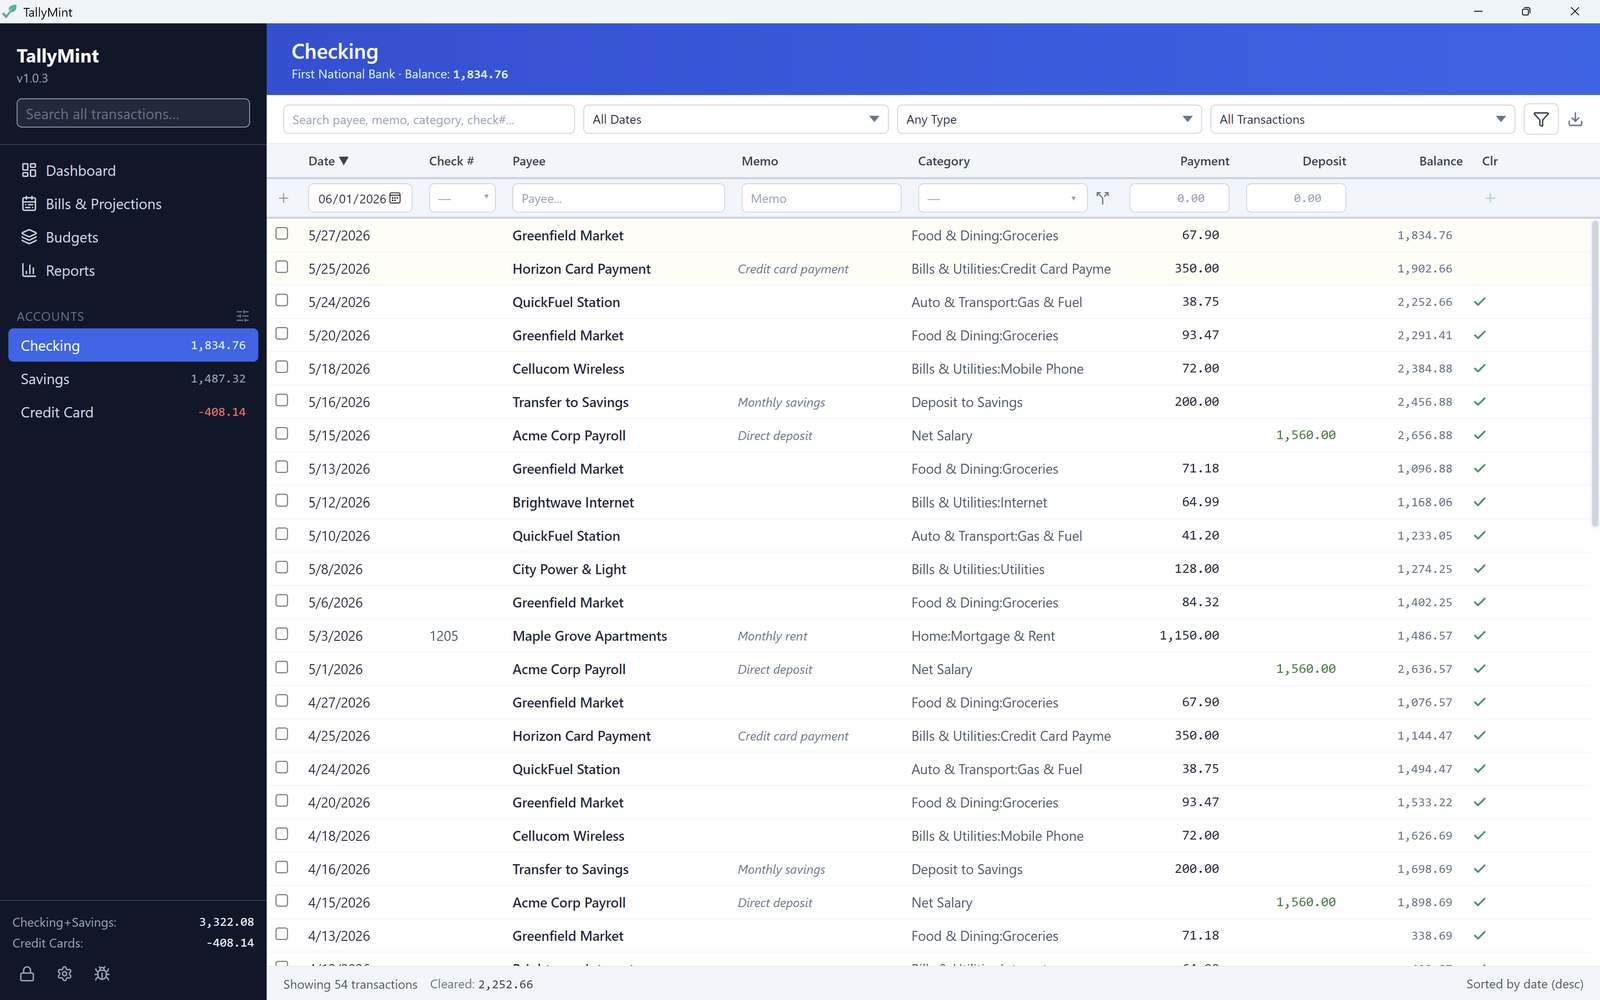
Open an account to see its register and start recording transactions. The register works like a checkbook register: date, payee, category, memo, an optional check number, a payment or deposit amount, and a running balance.
As you type a payee, TallyMint suggests names you have used before. Pick a suggestion and it fills in the category and memo you normally use for that payee, with the amount you paid last time shown alongside each suggestion, so repeat entries take a couple of keystrokes. You can also split a single transaction across several categories, and record transfers between two of your own accounts. The two combine, too: a split line can be a transfer to another account instead of a category, which is how a paycheck deposit can move part of itself straight to savings in one entry.
Step 4: Set up recurring bills and the projections calendar
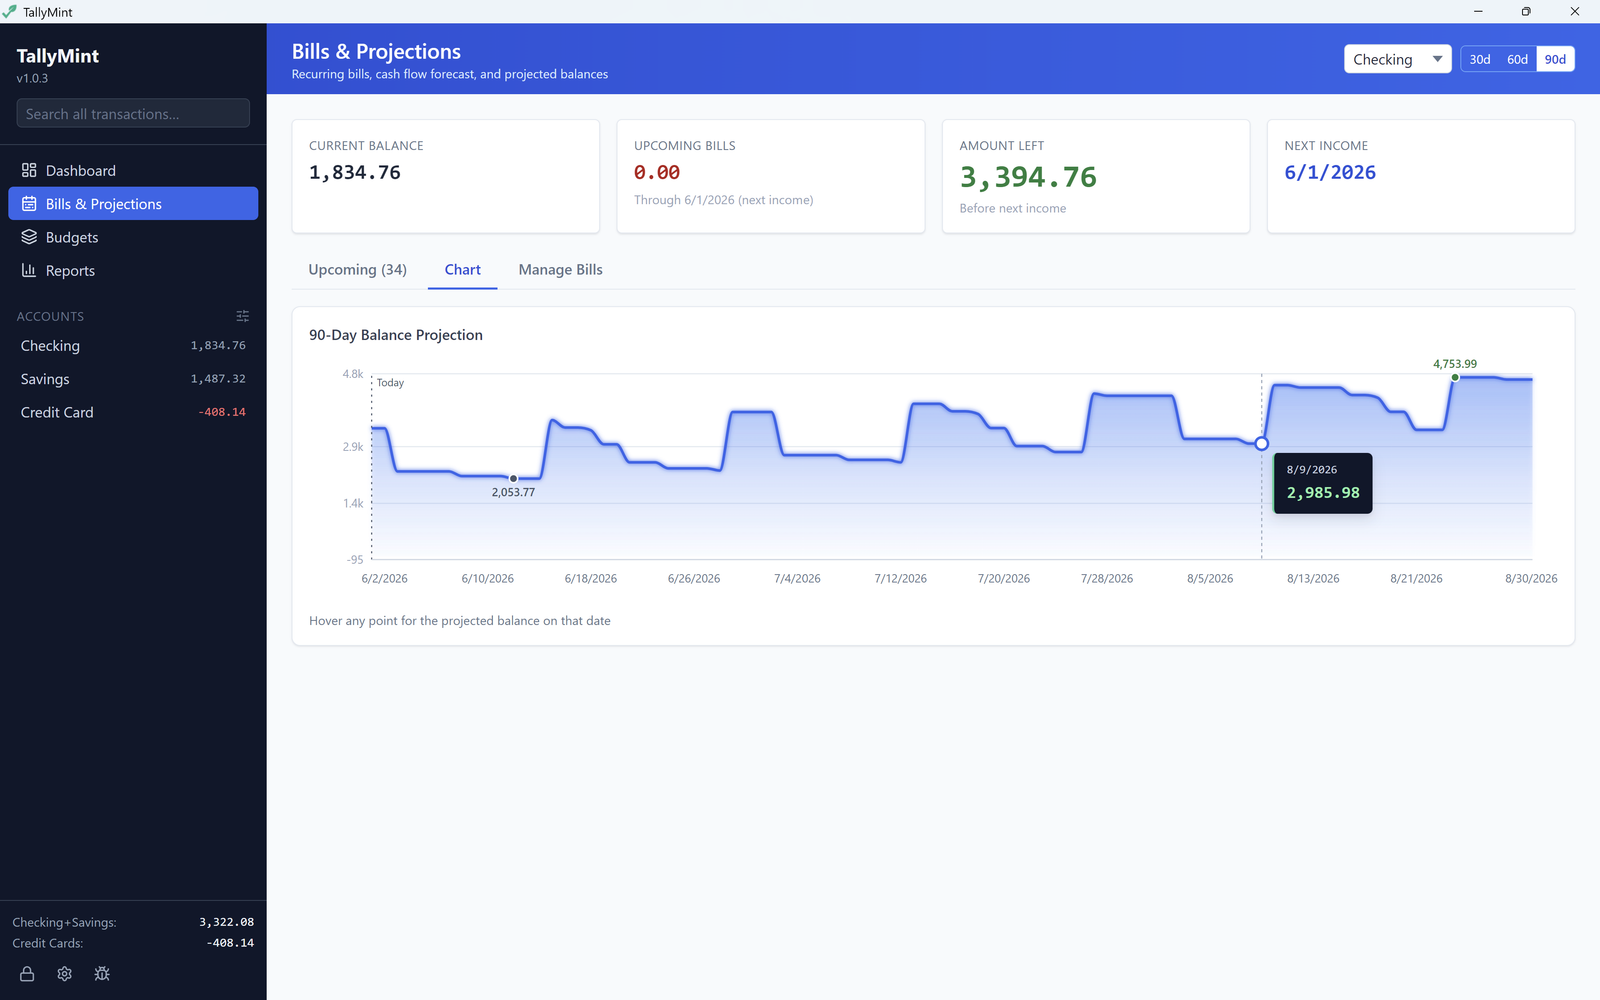
Recurring bills and income are what make TallyMint's forecast useful. Add each regular bill, subscription, loan payment, and paycheck, along with its amount and schedule. TallyMint uses these to project your balance forward and to fill the Bills and Projections calendar, so you can see what is due and when.
Each recurring bill can optionally auto-enter on its due date, or a set number of days earlier, which drops the transaction into your register automatically so your forecast stays accurate without manual upkeep. With your recurring items in place, TallyMint charts your projected balance 30, 60, or 90 days ahead and shows how much you have left to spend before your next paycheck once upcoming bills are covered. For the full picture, see the guide on forecasting your bank balance.
Step 5: Turn on automatic backups
TallyMint can back up your file for you. In Settings → Backups, turn on auto-backup so a copy is saved when you unlock the app, at most once every 24 hours. Backups default to a "backups" folder next to your data file, and you can point them somewhere else and choose how many to keep. You can also create a backup on demand with Create Backup Now.
Step 6: Lock the file when you are done
When you step away, lock the file so it is protected behind your master password again. Use Lock Database Now in Settings → General, and TallyMint prompts for the password the next time it opens. Locking is instant and does not touch your data; it just closes access until you unlock again.
Where to go next
- Import a Quicken QIF file to bring your history across from Quicken or another desktop app.
- Set up bank sync with SimpleFIN so new transactions arrive automatically and match what you have entered.
- Track investments with holdings, cost basis, and capital gains.