Budgeting in TallyMint
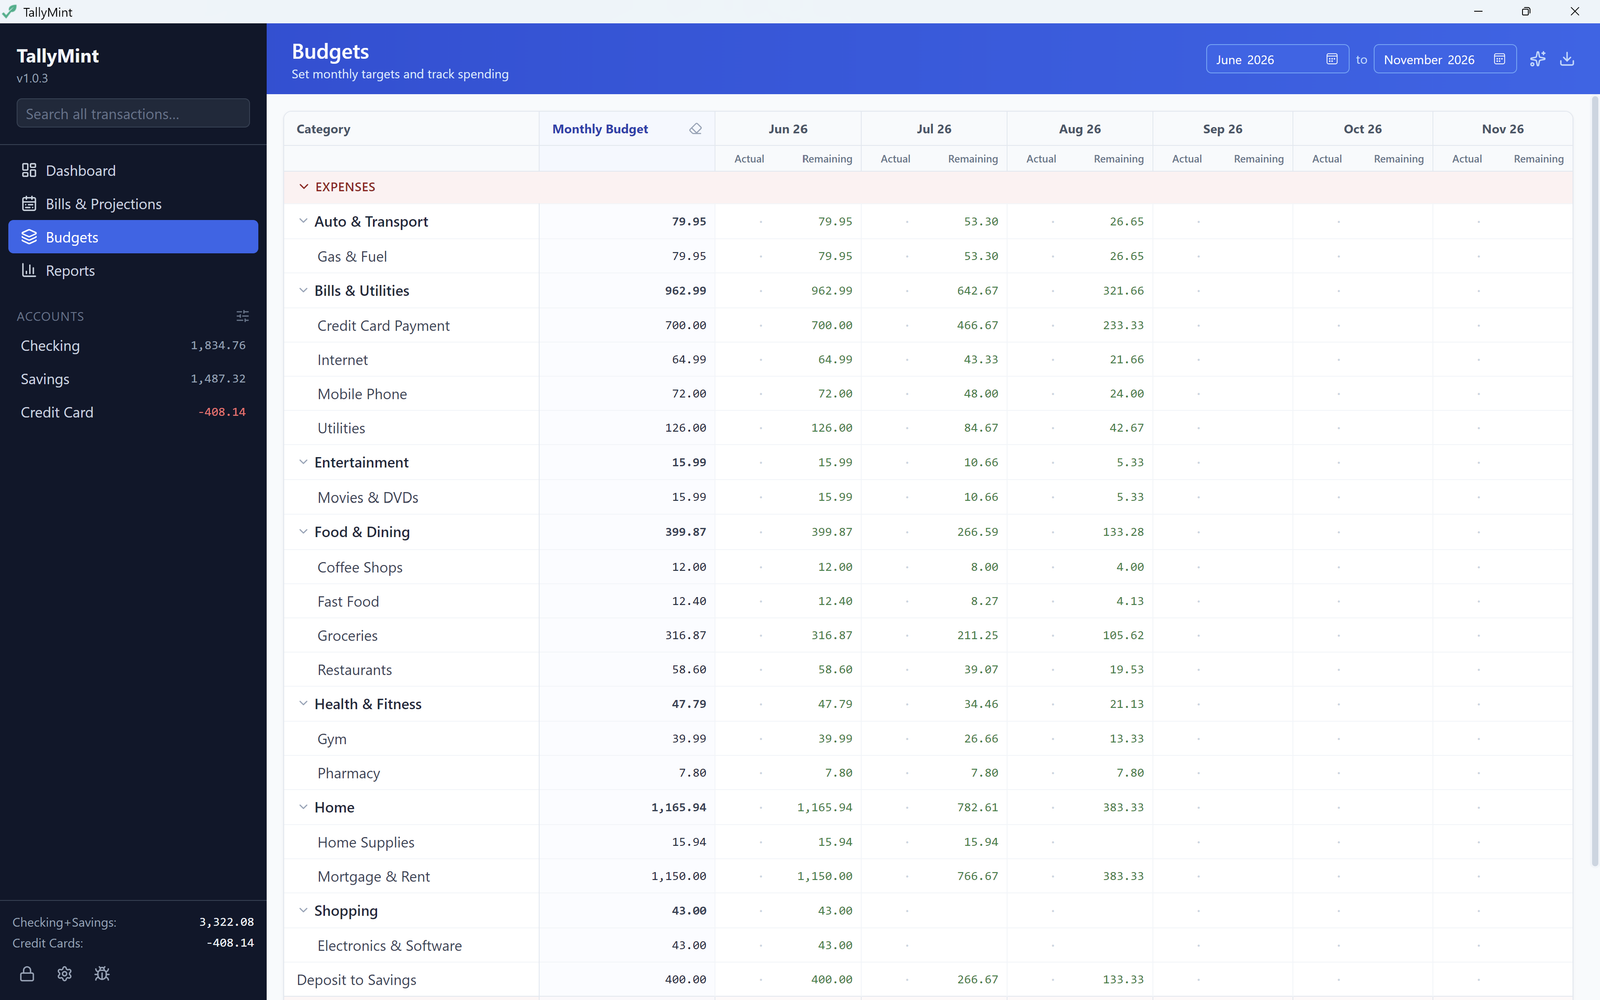
TallyMint budgets are simple monthly targets per category. The Budgets view lays your categories down the side and months across the top, and for each month shows what you actually spent next to what remains of the target. This guide covers creating a budget from scratch, the fastest way to seed one from your real spending, and how to read the grid.
Step 1: Get some transactions in first
Budgets are built on your categories, and a category appears in the budget grid once it has transactions in the months you are viewing (or a target already set). So the best first move is to have some real activity in the file:
- Moving from Quicken? Import your QIF file and your categories arrive with months of history attached, which makes the next step much more useful.
- Connected to your bank? Bank sync fills in recent transactions as you categorize them.
- Starting fresh? Enter and categorize transactions as you go; categories join the grid as they pick up activity.
Step 2: Auto-fill targets from your spending
The fastest way to generate a new budget is the Auto-Fill from Averages button (the sparkles icon at the top of the Budgets view). It sets each category's monthly target to a 3-month average of what you actually spent in that category. Two things to know:
- Targets you have already set are never overwritten, so you can auto-fill first and then adjust, or adjust first and auto-fill the rest.
- Averages come from your real categorized spending, so the more history you have (a QIF import helps here), the better the starting numbers.
Step 3: Fine-tune targets by hand
Click any category's Monthly Budget cell, type an amount, and press Enter. The target applies to every month currently in view. To remove a category's target, clear the cell and press Enter. The eraser icon in the Monthly Budget header clears all targets at once (it asks first).
Sub-categories are budgeted individually and roll up into their parent row; the parent shows a combined target once every one of its sub-categories has a target set.
Step 4: Track actual vs remaining
For every month in view, each category shows Actual (what you spent) and Remaining (target minus actual). Remaining is green while you are on track and red once you are over. Expenses and Income are tracked as separate sections with their own totals.
A couple of accounting notes, so the numbers match what you expect:
- Transfers between your own accounts do not count as spending.
- Investment account activity is excluded; buying shares is not household spending. This matches how Reports count cash flow.
Viewing a different year
The two month pickers at the top control the range of months in the grid; the default is the current month plus the next five. Change them to plan ahead or review an earlier year, and use the reset arrow to jump back to the default range. Targets are stored per month, so past months keep the targets they had.
You can also export the grid to CSV with the download icon for a spreadsheet copy of your budget.